How to organize study materials by subject
Build a library that is easy to browse without turning every tag, chapter, and exam date into a separate folder.
AI-assisted writing. Feature steps checked against StudySoda’s current editor, study screens, and API contracts. Our editorial approach
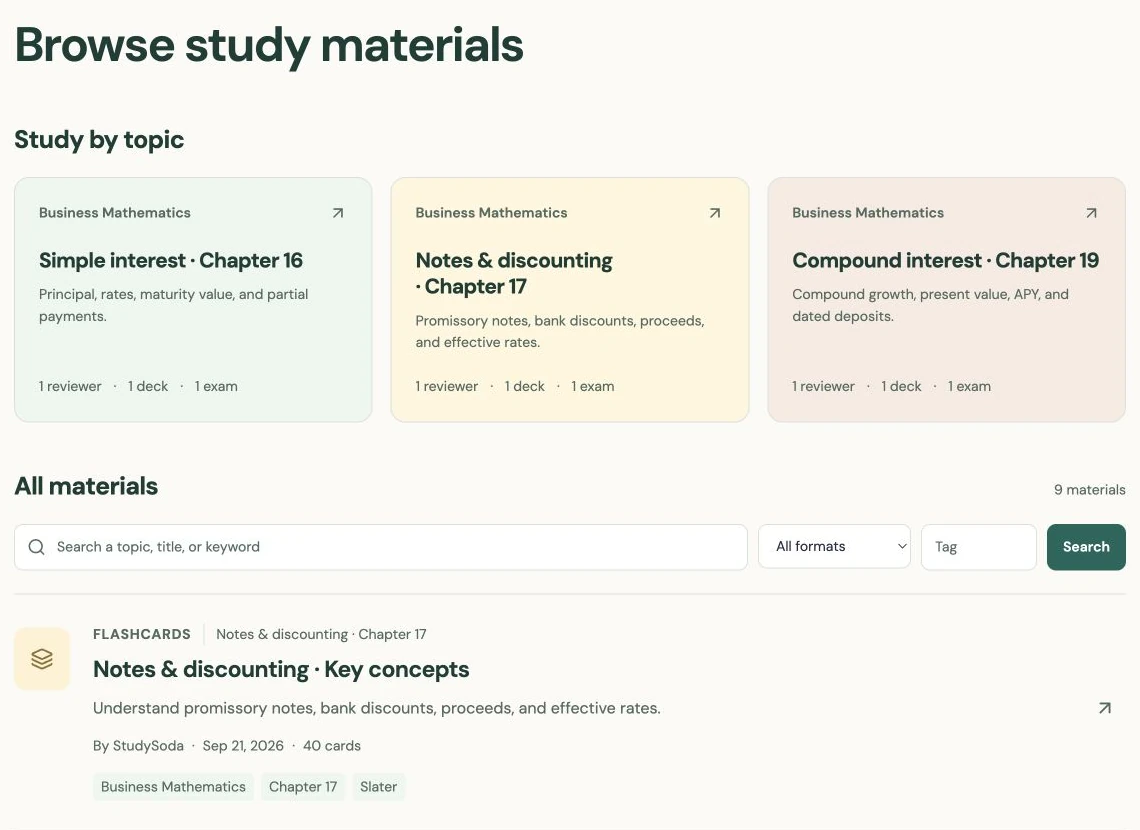
Use subjects for courses, topics for lessons, and descriptive material titles for the thing you want to study next.
Give each level one job
A growing library becomes difficult to navigate when the same idea is used as a subject, a topic, and a tag with slightly different names. Decide what each level means before reorganizing everything.
For example, Business Mathematics can be the subject. Simple interest and Compound interest can be topics. Inside Simple interest, name the materials “Simple interest reviewer,” “Simple interest definitions,” and “Simple interest practice exam.” The names describe the contents without requiring a learner to remember a private naming code.
Tags can add useful labels, but they do not link companion study formats. If you want the reviewer, cards, and exam to appear together in study navigation, give them the same topic. You do not need a subject for every textbook page or a new topic for every card.
Create a subject and assign materials deliberately
In Library, open Subjects and create a subject with a clear name. A short description can identify the course, level, or scope. Choose a color as a visual cue, while keeping the name meaningful enough to work without that color.
In a material’s editor, continue to Review & publish and choose an owned subject in the organization settings. If the material has a topic, that topic determines its subject so the collection stays consistent. To organize several connected formats, create or select their shared topic instead of assigning unrelated subjects separately.
The built-in StudySoda collection is separate from your own subjects. You can study its materials or make public copies where offered, then organize the copies you own. Making a copy does not give you editing control over the original collection.
Choose titles you will recognize a month later
Use Library to review what you have created. Look for vague titles, duplicate decks, and materials with no clear purpose. A title such as “Interest: choosing a 360- or 365-day year” can be easier to find than “Reviewer final final.”
Use a course or semester label only when it changes how you need to organize the work. If the same lesson remains useful across semesters, a stable topic can avoid repeated copies. If a new teacher uses different conventions, make that difference explicit in the description and the material itself.
Before moving a collection, inspect its existing topic memberships. A populated topic cannot be casually assigned a conflicting subject. Resolve the membership first so a learner does not encounter a reviewer under one course and its companion exam under another.
Distinguish removing a group from deleting content
Removing an owned subject clears its subject associations without deleting the materials. Its topics also lose that subject association. Removing a topic similarly detaches its materials. These actions are useful when a grouping no longer fits but the content is still worth keeping.
Deleting a material is more consequential: it removes the material and its associated attempts or study progress. Check the action’s wording rather than using deletion as a shortcut for reorganizing a library.
Finally, a subject is an organization tool, not a privacy setting. Public materials can make the associated subject publicly visible. Private materials remain owner-only, but the subject name and description should not contain confidential details when public content is attached. Check visibility on each material before sharing the collection.
Put it into practice.
Open Subjects